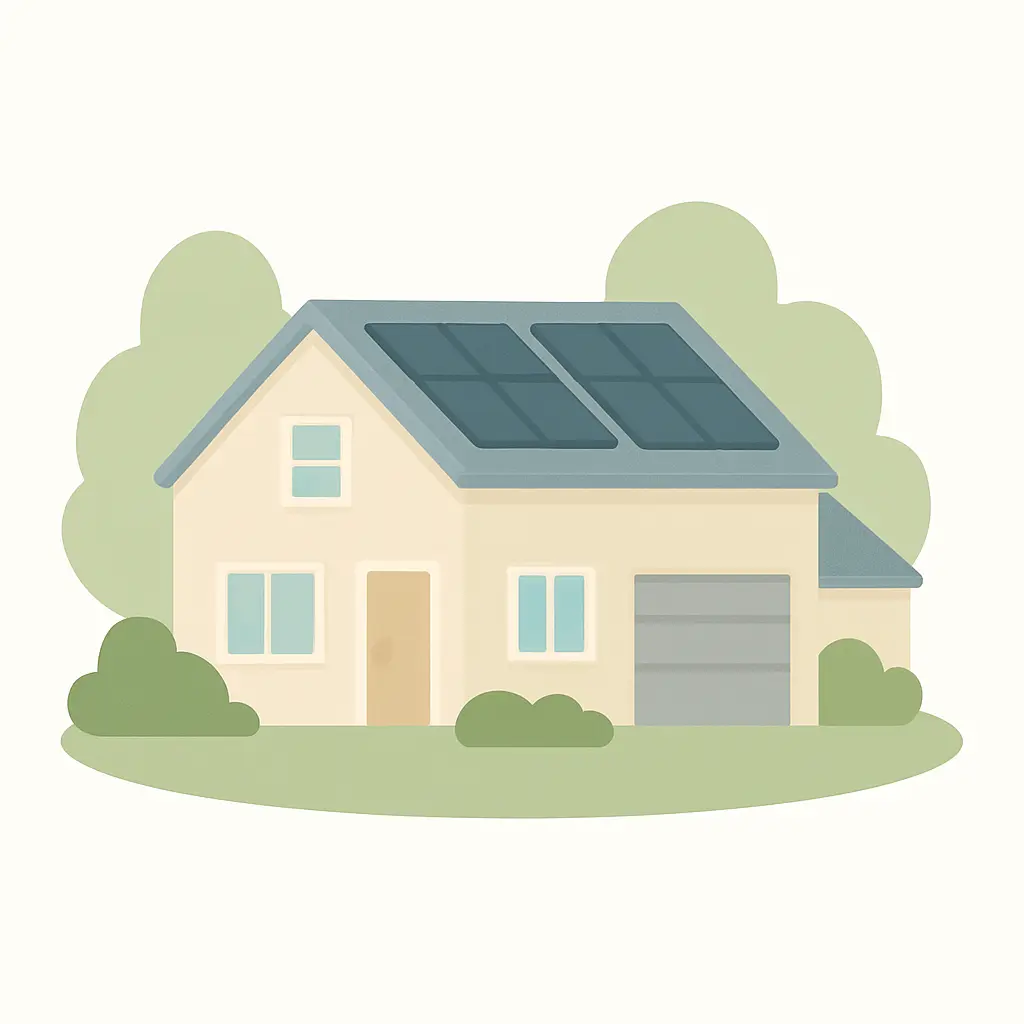
Introduction: Is the Solar Journey Right for You?
Welcome. Embarking on the path to solar energy can feel like learning a new language, one filled with kilowatts, inverters, and tax credits. It is a significant decision, and the sheer volume of information can be overwhelming. This guide is designed to be a trusted companion on that journey. It will translate the complex technical jargon and financial details into a clear, manageable path forward, empowering homeowners with the knowledge needed to make a confident and informed choice.
This resource will serve as a comprehensive roadmap, leading from the initial spark of curiosity to the long-term realities of owning a home solar system. The chapters are structured to follow the logical progression of the decision-making and installation process:
- Chapter 1: The "Why" - Motivations for Going Solar: Exploring the core reasons homeowners consider solar and checking for basic feasibility.
- Chapter 2: Solar 101 - How It All Works: Demystifying the technology behind generating electricity from sunlight.
- Chapter 3: The Financials - Understanding Costs, Savings, and Incentives: A deep dive into the numbers, from upfront costs to long-term returns.
- Chapter 4: Finding Your Partner - How to Choose a Good Installer: A guide to vetting and selecting the most important partner in this process.
- Chapter 5: The Project - From Contract to Installation: A step-by-step look at the project timeline from a homeowner's perspective.
- Chapter 6: Life with Solar - Ownership and Maintenance: Understanding what to expect after the system is up and running.
The goal of this guide is not to sell a product, but to provide objective, clear, and thorough information. It is an educational tool designed to help homeowners ask the right questions, evaluate their options critically, and ultimately decide if investing in solar power is the right move for their home and their family.
The "Why" - Motivations for Going Solar
Before diving into the technical details, the most important step is to ask a fundamental question: "Why am I considering solar?" Understanding personal motivations is crucial because they will serve as a guide throughout the decision-making process, influencing everything from system design to financing choices. Homeowners are typically driven by a combination of three primary factors.
Primary Motivations (The "Big Three")
- Financial Savings: For most people, the number one reason to go solar is to save money.[1] By generating electricity on the rooftop, a homeowner can drastically reduce or even eliminate their monthly utility bill. Solar also acts as a powerful hedge against the unpredictable and often rising costs of electricity from utility companies. With a solar system, a homeowner can essentially lock in their electricity costs for the next 25 years or more, gaining long-term price stability and control over a major household expense.[1, 2]
- Environmental Stewardship: A significant and growing motivation is the desire to reduce one's environmental impact. Solar power is a clean, renewable energy source that produces no greenhouse gas emissions during operation.[3] By switching to solar, a household directly lowers its carbon footprint. A single residential solar system can have a substantial positive effect, with some estimates suggesting it can eliminate three to four tons of carbon emissions each year—an environmental benefit equivalent to planting around 100 new trees annually.[1]
- Energy Independence & Resilience: The desire for greater self-sufficiency is another powerful driver. Going solar reduces a home's reliance on the large, centralized utility grid, which can be vulnerable to outages and price volatility.[2] It is critical to understand, however, that a standard grid-tied solar system will not provide power during a blackout for safety reasons. The desire for true energy resilience—having power during a grid failure—is what leads many to explore hybrid systems with battery storage. While this guide focuses on the more common grid-tied setup, homeowners primarily motivated by outage protection should view battery storage as a necessary, additional investment to research.[2]
The primary motivation will shape the entire project. For instance, a homeowner focused purely on the fastest return on investment (ROI) might choose the most cost-effective panel and inverter combination and forgo a battery. In contrast, a homeowner who prioritizes having backup power during storms will see a battery as an essential part of the system, even though it increases the upfront cost and extends the financial payback period.[2] Clarifying this "why" from the outset provides a north star for all subsequent decisions.
A Simple "First-Pass Checklist" for Viability
Before investing significant time and energy into research, it is wise to run through a quick checklist to see if solar is a realistic possibility for a property. This checklist acts as a critical gatekeeper, managing expectations and preventing homeowners from pursuing an option that may not be currently feasible.
- Do you own your home? [2] Installing a solar panel system is a permanent modification to the property. For this reason, homeowners must have ownership of the property to proceed. Renters are not eligible to install their own systems.
- Is your roof in good condition? Solar panels come with warranties lasting 25 years or more. The roof they sit on should have a comparable lifespan. If a roof is old or needs replacement within the next few years, it is far more cost-effective to replace it before installing solar. Otherwise, the homeowner will have to pay for the solar panels to be removed and then reinstalled during the roof replacement, adding significant and unnecessary cost.
- Does your roof get a decent amount of sun? Solar panels need direct sunlight to generate electricity efficiently. A roof that is heavily shaded by large trees or neighboring buildings for most of the day may not be a good candidate for solar. In the northern hemisphere, a south-facing roof is considered ideal as it captures the most sunlight throughout the day. However, east- and west-facing roofs are also very viable and common for residential installations.
What if My Roof Isn't Suitable?
If a roof is not a good fit for solar panels—perhaps due to its age, shape, material, or excessive shading—the journey does not necessarily have to end. For homeowners with enough available land, a ground-mounted solar system is an excellent alternative. These systems are installed on a metal framework secured in the yard. While they are often more expensive than rooftop systems due to the need for trenching and a separate support structure, they offer some distinct advantages. Installers can orient the panels at the perfect angle and direction to maximize sun exposure, and they are easier to access for cleaning and maintenance.
Solar 101 - How It All Works
At its heart, the process of generating solar power is elegant and simple. Many complex scientific principles are at play, but the fundamental concept can be understood through a simple analogy: think of it as photosynthesis for a house.[4] Just as a plant's leaves capture sunlight to create energy, solar panels capture sunlight to create electricity for a home. The sunlight that reaches the earth is composed of tiny energy particles called photons. When these photons strike a solar panel, they energize the electrons within the panel's cells, causing them to move and create an electrical current. This is the magic of the photovoltaic effect.
To make this happen, a few key components work together as a miniature power plant for the home.
The Key Components (Your Home's Power Plant)
- Solar Panels (Photovoltaic or PV panels): These are the most visible part of the system, the "leaves" that do the energy gathering. Each panel is made up of many solar cells, which are typically composed of silicon, a semiconductor material. When sunlight hits these cells, they convert the solar energy into Direct Current (DC) electricity.[5, 6] Modern solar panels are incredibly durable, built to withstand hail, snow, and high winds for decades.[7]
- Inverter(s): The inverter is the "brain" of the entire operation. Its essential job is to take the DC electricity produced by the panels and convert it into Alternating Current (AC) electricity. AC is the standard form of power that all home appliances, from the refrigerator to the television, use. The choice of inverter technology is one of the most critical decisions in the solar journey, as it directly impacts the system's lifetime energy production and reliability. There are two main types:
- String Inverters: This is a single, centralized box, often mounted on a wall in a garage or basement. The solar panels are wired together in a series, or a "string," and this string feeds all its DC power into the central inverter for conversion.[5] This is a proven and cost-effective technology. However, it has one significant drawback: because the panels are linked like old-fashioned holiday lights, if one panel's output drops due to shading from a tree or a chimney, the production of the entire string can be dragged down to that lower level.[5]
- Microinverters: This newer technology places a small, individual inverter on the back of every single solar panel.[5] Instead of one central brain, each panel has its own. Microinverters convert DC to AC right at the source. This means each panel operates independently. If one panel is shaded, the others continue to produce at their full potential, maximizing the system's overall energy harvest. This technology also allows for more flexible system designs on complex roofs and enables panel-level monitoring, so a homeowner can see the performance of each individual panel through an app.[5] While microinverters typically have a higher upfront cost, they often lead to greater energy production over the system's life, especially on roofs with any partial shading.
- Racking/Mounting: This is the system's skeleton. It is the durable, weatherproof hardware that securely fastens the solar panels to the roof or to a ground-mounted frame. This equipment is engineered to withstand the elements for decades and ensure the panels stay put.
- Utility Meter (The New Gatekeeper): As part of the installation process, the utility company will replace the home's existing electric meter with a bi-directional meter. This special meter is the physical link that makes the financial model of solar work. It is designed to measure electricity flowing in two directions: the power a home pulls from the grid (which happens at night or on cloudy days) and the excess power a solar system sends to the grid when it's producing more than the home is using. This ability to track both flows is what allows the utility to credit the homeowner for their surplus energy production.
Putting It All Together: The Grid-Tied System
The vast majority of residential solar installations in the U.S. are grid-tied systems. This means the home's solar power system is interconnected with the traditional utility grid. This setup offers the best of both worlds:
- During the day: The sun shines on the panels, which generate DC electricity. The inverter converts this to AC power. The home's appliances use this solar power first. If the panels are producing more than the home needs at that moment, the surplus power is automatically exported to the utility grid. The bi-directional meter spins backward, recording a credit for every unit of energy sent out.
- At night (or on very cloudy days): When the solar panels are not producing energy, the home automatically and seamlessly draws the power it needs from the utility grid, just as it always has. The bi-directional meter spins forward, and the home uses up the credits it banked during the day.
It is essential to understand a critical safety feature of grid-tied systems: in the event of a power outage, the solar system automatically shuts down. This is to prevent the system from sending electricity out to the grid while utility workers are trying to repair the power lines. To have backup power during an outage, a homeowner needs a hybrid system, which includes battery storage.[2, 8] This is an important distinction and a topic for further research if outage protection is a primary goal.
The Financials - Understanding Costs, Savings, and Incentives
Understanding the financial side of solar is paramount. This involves looking at the upfront cost, the mechanisms for saving money, the powerful incentives that reduce the price, and the different ways to pay for the system. Navigating these details is the key to determining if solar is a sound financial investment for a specific home.
The Upfront Cost: How Solar is Priced
The initial "sticker price" of a solar system can seem high, but it is important to understand how it is calculated and that this initial number is almost never the final price paid.
- System Size in Kilowatts ($kW$): The size of a solar system is measured in kilowatts ($kW$), which is a measure of its power capacity—much like horsepower in a car.[6, 9] A larger system can generate more power at any given moment. The average residential solar system in the U.S. is typically between 6 and 11 kW, depending on the home's energy consumption.[10, 11]
- Cost in Dollars per Watt ($/W$): To compare quotes fairly, the industry uses a standard metric: dollars per watt ($/W$). This is calculated by dividing the total cost of the system by its size in watts (1 kW = 1,000 watts). In 2025, the national average cost for a residential solar installation typically falls in the range of $2.50 to $3.50 per watt before any incentives are applied.[11, 12] This price can vary significantly based on location, equipment quality, and the installer chosen. Focusing on the $/W allows for a true apples-to-apples comparison between different quotes.
- Kilowatts vs. Kilowatt-Hours: It is crucial to understand the difference between a kilowatt ($kW$) and a kilowatt-hour ($kWh$).
- $kW$ is a unit of power. It measures how much electricity a system can produce at one instant.
- $kWh$ is a unit of energy. It measures the total amount of electricity produced or consumed over time. A utility bill is measured in $kWh$.
- The relationship is simple: $Power (kW) \times Time (hours) = Energy (kWh)$. A 10 kW system running at full power for one hour produces 10 kWh of energy.
A homeowner might see a quote for a $28,000 system and experience sticker shock.[11] However, this number is functionally irrelevant on its own. The focus must shift to the net cost after all available incentives are applied, as this represents the true out-of-pocket expense.
How You Save Money: The Magic of Net Metering
For a grid-tied solar system, the primary way a homeowner saves money is through a billing arrangement called Net Metering. It is best to think of the utility grid as a giant, shared battery that a homeowner can use without having to purchase or maintain it.
- During sunny days, when the solar system produces more electricity than the home is consuming, the excess energy is sent to the grid. The bi-directional meter tracks these "deposits," and the utility company provides a credit on the electric bill.[13]
- At night or on cloudy days, the home draws power from the grid, making "withdrawals" against the banked credits.
- At the end of the billing cycle, the homeowner is only billed for their "net" consumption—the difference between the energy they withdrew and the energy they deposited.
Crucial Nuance: Net metering policies are not uniform across the country.[13, 14] Some states and utilities offer "1-for-1" retail rate net metering, where each kWh sent to the grid is worth the same as a kWh bought from the grid. Other locations may offer a lower credit value or have different rules about how credits roll over month to month. This is one of the most important areas for a homeowner to research for their specific location.
Incentives That Slash the Cost
Financial incentives are what make solar power an accessible and attractive investment for millions of American homeowners. These incentives can dramatically reduce the net cost of a system.
- Federal Residential Clean Energy Credit: This is the single most significant financial incentive available nationwide.[2]
- It is a tax credit, not a cash rebate. A tax credit is a dollar-for-dollar reduction in the amount of federal income tax a person owes.[15] For example, if a homeowner owes $10,000 in federal taxes for the year and has an $8,000 solar tax credit, their tax liability is reduced to just $2,000.
- The credit is currently valued at 30% of the total cost of the solar energy system, including panels, inverters, battery storage (if installed with solar), and all associated labor costs.[11, 15]
- To claim the full credit, a homeowner must have a federal tax liability at least equal to the credit amount. If not, the remaining credit can often be rolled over to the next tax year.[11]
- This 30% credit is available for systems installed by December 31, 2025, after which it is scheduled to expire unless renewed by Congress.[16, 17]
- State, Local, and Utility Incentives: This is where local research becomes critical. In addition to the federal credit, many other incentives exist that can further reduce costs. These can include [1, 2]:
- State tax credits
- Upfront cash rebates from the state or a local utility
- Performance-based incentives, which pay for the actual energy the system produces
- The DSIRE Database: The best resource for finding every available incentive is the Database of State Incentives for Renewables & Efficiency (DSIRE). This comprehensive, publicly funded database allows homeowners to search by zip code to find a complete list of federal, state, local, and utility-level incentives they may be eligible for.
Ways to Pay for Solar
The choice of how to pay for a solar system is a strategic decision about ownership and long-term financial returns. This choice will have a greater impact on the overall financial outcome than almost any other factor.
- Cash Purchase: Paying in cash offers the highest return on investment. The homeowner owns the system outright from day one, has no interest payments, and is entitled to all savings and financial incentives, including the federal tax credit.[5]
- Solar Loan: This is a very common option. The homeowner takes out a loan to finance the system, making them the owner and thus eligible for all tax credits and rebates. They pay the loan off over time, similar to a car loan or home equity loan. While the loan interest will slightly reduce the total ROI compared to a cash purchase, it makes solar accessible with little to no money down.[5]
- Solar Lease & Power Purchase Agreement (PPA): These options are fundamentally different because the homeowner does not own the solar system. A third-party company installs and owns the equipment on the roof.[5, 18]
- Pros: The main advantage is little to no upfront cost. The third-party owner is also responsible for all maintenance and repairs.[18]
- Cons: Because the homeowner does not own the system, they are not eligible for the 30% federal tax credit or other ownership-based rebates—the third-party owner claims these benefits.[5] The monthly savings are lower, as the homeowner makes a fixed monthly lease payment or pays a set rate per kWh for the power produced under a PPA. These contracts are very long (typically 20-25 years) and often include annual "escalator" clauses that increase the payment rate each year. Most significantly, a lease or PPA can severely complicate a home sale, as the new buyer must be willing and able to qualify for and assume the remainder of the long-term contract.[18, 19]
The financing decision creates a cascade of consequences related to tax benefits, total savings, and property value. The following table clarifies these fundamental trade-offs.
| Feature | Cash Purchase | Solar Loan | Solar Lease | PPA (Power Purchase Agreement) |
|---|---|---|---|---|
| Upfront Cost | High | Low to None | None | None |
| Who Owns the System? | Homeowner | Homeowner | Third Party | Third Party |
| Who Gets the Tax Credit? | Homeowner | Homeowner | Third Party | Third Party |
| Monthly Payment | None | Loan Payment | Lease Payment | PPA Payment (per kWh) |
| Highest Financial Savings? | Yes | Good | Lower | Lower |
| Maintenance Responsibility | Homeowner | Homeowner | Third Party | Third Party |
| Impact on Home Sale | Asset (Adds Value) | Asset (Adds Value) | Potential Complication | Potential Complication |
Finding Your Partner - How to Choose a Good Installer
After understanding the "why," the "how," and the "how much," the next step is arguably the most critical of the entire process: choosing an installation partner. The quality of the installer is more important than the specific brand of panels or inverters they use. A great installer using standard, reliable equipment will deliver a better long-term outcome than a poor installer using premium equipment. This is a 25-year investment, and the installer is a long-term partner in that investment.
Get Multiple Quotes
The first rule of choosing an installer is to never go with the first quote. A homeowner should get at least three to four quotes from different companies.[20] This is the only way to get a true sense of fair market pricing, compare different equipment and warranty offerings, and gauge the professionalism of various companies.
What to Look for in an Installer (Your Vetting Checklist)
A reputable installer should be able to easily provide documentation and answers for the following criteria. A company that is hesitant or unable to do so should be considered a red flag.
- Proper Licensing and Insurance: This is the absolute baseline for consideration and is non-negotiable. The company must hold all required state and local licenses for electrical and contracting work. They must also carry sufficient general liability and worker's compensation insurance. This protects the homeowner from any liability in the event of an accident or property damage during the installation.
- Industry Certifications (The Gold Standard): While many installers are licensed, the best ones pursue additional, voluntary certifications to prove their expertise. The most important credential to look for is NABCEP (North American Board of Certified Energy Practitioners) certification. NABCEP is the most respected certification body in the North American renewable energy industry. A NABCEP-certified installer has passed rigorous exams and demonstrated a high level of knowledge, experience, and commitment to quality and ethical practices.
- Years in Business & Local Experience: Look for a company that has been in business for a significant amount of time, ideally five to ten years or more. A well-established company is more likely to be around in the future to honor its warranties. The installer's workmanship warranty is only as good as the company that backs it; if the company goes out of business, the warranty disappears. Furthermore, deep local experience is invaluable. An installer who has worked in a specific area for years will be intimately familiar with the local permitting offices and utility interconnection processes, which can prevent costly and time-consuming delays.[20]
- Good Reviews and Local References: Do the research. Check online reviews on independent sites like Google, Yelp, and the Better Business Bureau (BBB) to gauge customer satisfaction. Do not hesitate to ask the installer for a list of local references—specifically, from customers with recently completed projects—that can be contacted directly to discuss their experience.[20]
How to Compare Quotes (Apples to Apples)
Once multiple quotes are in hand, it is important to compare them on more than just the bottom-line price. The cheapest quote is not always the best value. A low price could signify inferior equipment, an inexperienced crew, or a weak warranty. To make a true comparison, focus on these key areas:
- Proposed Equipment: Look at the specific brands and model numbers for the solar panels and inverters. A quick online search can reveal if these are high-quality, reputable manufacturers with a strong track record.
- Warranties: Compare the three key warranties offered: the product warranty (for equipment), the performance warranty (for panel output), and, most importantly, the installer's own workmanship warranty, which covers the labor.
- Estimated Annual Production: This is a critical figure, usually expressed in kilowatt-hours (kWh), that will be listed on the quote. It represents the installer's projection of how much energy the proposed system will generate in a year. When comparing similarly sized systems, this number should be relatively close across quotes. A significant outlier—either much higher or much lower—warrants a follow-up question.
To standardize the comparison process, it is helpful to use a checklist. This transforms a confusing pile of documents into a clear decision matrix and forces a focus on the most important variables. The most powerful tool for this is calculating the cost per watt ($/W$) for each quote. This is the great equalizer, allowing for a true price comparison even if the proposed system sizes are slightly different.
| Feature | Installer A | Installer B | Installer C |
|---|---|---|---|
| Total System Size (kW) | |||
| Total Cost (Before Incentives) | |||
| Cost per Watt ($/W$) | |||
| Panel Brand & Model | |||
| Inverter Brand & Model | |||
| Estimated Annual Production (kWh) | |||
| Product Warranty (Years) | |||
| Performance Warranty (Years/% at Year 25) | |||
| Workmanship Warranty (Years) | |||
| NABCEP Certified? (Y/N) | |||
| Years in Business |
The Project - From Contract to Installation
Once an installer has been chosen and a contract signed, the project moves into the execution phase. It is important for homeowners to have a realistic understanding of the timeline. While the physical installation on the roof is surprisingly fast, the entire process from contract to activation can take anywhere from two to six months. Much of this time is dedicated to administrative work, such as design and permitting, which is handled by the installer.
The homeowner's direct involvement is heavily front-loaded in the sales and decision-making process. After the contract is signed, the project enters a phase that is largely a waiting game while the professionals handle the bureaucracy. Understanding this workflow can prevent frustration and manage expectations.
The Homeowner's View of the Process
From the homeowner's perspective, the project unfolds in a series of clear, sequential steps.
- Contract Signing: This is the official kickoff. Once the contract is signed, the installer will begin the formal process of designing and planning the system.
- Site Assessment & Final Design: Shortly after the contract is signed, an engineering team from the installation company will schedule a site visit. This is a more detailed follow-up to the initial sales consultation. They will take precise measurements of the roof, assess its structural integrity, and inspect the home's main electrical panel to ensure it can accommodate the new solar circuit.[21] The data gathered during this visit is used to create the final, detailed engineering plans for the system.
- Permitting (Handled by Installer): This is often the longest and most unpredictable phase of the entire project. The installer will take the final engineering plans and submit them, along with all other required paperwork, to the local city or county building department for approval.[21] The time it takes to receive a permit can vary dramatically depending on the municipality, ranging from a few weeks to two months or more. The homeowner's role during this phase is simply to be patient.
- Installation Day(s): This is the most exciting part of the process. Once the permit is approved and the equipment has been ordered and delivered, the installation crew will arrive. The physical installation work is remarkably efficient. For a typical residential system, the crew can often complete the entire installation—mounting the racking, fastening the panels, and wiring the inverters and electrical connections—in just one to three days.[21, 22]
- City/Utility Inspection: After the installation is complete, it must be inspected. The installer will coordinate with the local building department to have an inspector visit the site. The inspector's job is to verify that the system was installed correctly, meets all electrical and building codes, and is safe to operate.
- Permission to Operate (PTO): This is the final hurdle. After the system passes inspection, the results are sent to the local utility company. The utility will then grant final Permission to Operate (PTO).[22, 21] Once PTO is issued, the installer will give the homeowner the green light to flip the switch and officially begin generating their own clean electricity.
The speed and success of this entire process, particularly steps 3, 5, and 6, are heavily dependent on the installer's local expertise. An installer with years of experience in a specific city or county will have established relationships and a deep understanding of the local rules and procedures, which can be the difference between a smooth two-month project and a frustrating six-month ordeal.[20] This reinforces the critical importance of the vetting process detailed in the previous chapter.
Life with Solar - Ownership and Maintenance
With the system installed and operating, the journey shifts from a project to be completed to an asset to be owned. Life with solar is characterized by quiet, reliable energy production, minimal maintenance, and long-term peace of mind backed by robust warranties.
Monitoring Your System
Modern solar systems make it easy to see the benefits in real time. Most installations come with monitoring software that is accessible through a simple smartphone app or web portal.[21, 23] This allows a homeowner to:
- Track the system's energy production on a daily, weekly, and monthly basis.
- See how much money is being saved on electricity bills.
- Monitor the health of the system. The software will often send an alert if a panel or inverter is underperforming or has malfunctioned, allowing for a quick diagnosis and service call.[24]
Maintenance: Debunking the Myth
One of the most common misconceptions about solar is that it requires extensive maintenance. The reality is that solar panel systems are remarkably durable and require very little upkeep, primarily because they have no moving parts.[23]
For the vast majority of homeowners, the only maintenance required is occasional cleaning.[24, 25] Over time, panels can accumulate dust, pollen, leaves, or bird droppings, which can slightly reduce their ability to absorb sunlight.
- In climates with regular rainfall, the rain itself is often sufficient to wash away most debris.[24]
- If manual cleaning is needed, it is generally recommended only two to four times per year.[24] This can often be accomplished with a simple spray from a garden hose from the ground. For more stubborn grime, a soft-bristled brush with a long handle and soapy water can be used. It is important to never use harsh, abrasive cleaners or high-pressure washers, which could damage the panels.
Understanding Your Warranties (Your 25-Year Safety Net)
A solar system is protected by a multi-layered warranty structure that provides comprehensive coverage for the long term. It is crucial to understand the three distinct types of warranties that come with an installation, as they cover different things and are provided by different entities.
- Panel Performance Warranty: This warranty comes from the panel manufacturer and guarantees the panel's electricity production over its lifespan. Solar panels slowly lose efficiency over time—a process called degradation. A typical performance warranty guarantees that the panel will still produce at a high percentage of its original rated output, such as 80-90%, after 25 years. This protects the homeowner's investment against abnormally fast degradation.
- Product/Equipment Warranty: This warranty also comes from the equipment manufacturehrefs r (of the panels and inverters). It covers the physical integrity of the hardware itself, protecting against manufacturing defects, premature failure, or unreasonable wear and tear. Product warranties for solar panels typically last 10 to 25 years. Inverter warranties range from 10 to 25 years, with microinverters often carrying longer warranties than central string inverters.
- Workmanship Warranty: This warranty is provided by the installer, not the manufacturer. It is a guarantee on the quality of the labor performed during the installation. It protects the homeowner against issues arising from installation errors, such as faulty wiring, improper mounting, or, most critically, roof leaks caused by the installation. A typical workmanship warranty lasts 1 to 10 years, though some top-tier installers offer longer terms.[20]
This three-part structure creates a "chain of responsibility." If a problem arises, the first call is always to the installer. They will diagnose the issue. If it is an installation error, their workmanship warranty applies. If it is a hardware failure, they will manage the warranty claim with the manufacturer on the homeowner's behalf. This highlights, once again, the importance of choosing a reputable and stable installer who will be there to honor their commitments.
| Warranty Type | What It Covers | Who Provides It | Typical Length |
|---|---|---|---|
| Performance | Guarantees a minimum level of electricity production over time. | Panel Manufacturer | 25 Years |
| Product | Protects against defects and failures of the physical equipment. | Equipment Manufacturer | 10-25 Years |
| Workmanship | Covers errors or issues related to the installation labor. | Your Installer | 1-10 Years |
Solar & Your Home's Value
A solar installation is more than just an appliance; it is a significant home improvement that can increase property value. It is important to note that this benefit is tied directly to ownership.
- Recent research confirms that owned solar systems (those purchased with cash or a loan) are viewed as a valuable asset by homebuyers. A 2025 study analyzing Zillow data found that, on average, homes with owned solar panels sold for 6.9% more than comparable homes without solar.[26, 27] For a median-valued home, this premium can often exceed the net cost of the installation itself.
- This directly connects back to the financing decision made in Chapter 3. Choosing a lease or PPA, while offering the convenience of no upfront cost, means forfeiting this significant increase in home equity.[19] The decision to own the system transforms it from a simple utility-bill-reducing service into a tangible, value-adding asset that pays dividends both monthly and at the time of sale.
Conclusion: Your Solar Journey Begins
The journey to solar power is a significant undertaking, but it is a manageable one. It begins with understanding personal motivations—be they financial, environmental, or a desire for resilience. It requires learning the basics of how the technology works and, most importantly, how the finances stack up. The process hinges on making two critical choices: the right financing option that aligns with long-term goals and the right installation partner to ensure a high-quality, reliable system. By following the steps laid out in this guide, any homeowner can navigate this process with confidence.
The key takeaways are clear:
- Solar is a major home improvement driven by clear financial and personal goals.
- A grid-tied system allows a home to generate its own power while remaining securely connected to the utility.
- The true cost of solar is the net cost after all federal, state, and local incentives are applied.
- The choice between owning (cash/loan) and not owning (lease/PPA) a system has profound long-term financial consequences.
- Vetting and selecting a high-quality, experienced, and certified installer is the single most important decision in the process.
- An owned solar system is a low-maintenance, durable asset that reduces bills and increases the value of a home.
With this knowledge in hand, the path forward is clear. The next steps are no longer a mystery but a simple, actionable checklist.
Your "Next Steps" Checklist
- Gather Your Data: Collect the last 12 months of electricity bills. This will show how many kilowatt-hours (kWh) the home uses annually, which is the first piece of information any installer will need.
- Do Your Local Research: Visit the DSIRE database at dsireusa.org. Enter the home's zip code to find a comprehensive list of all state, local, and utility incentives available in the area.
- Find Your Partners: Begin researching local solar installers. Look for companies with a long track record, positive reviews, and, ideally, NABCEP certification.
- Get Your First Quote: Contact at least three of the most promising installers to schedule a consultation and receive a preliminary quote. This will officially start the process of comparing options.
The solar journey requires careful consideration, but it is no longer an impenetrable maze. Armed with this guide, homeowners are now equipped with the map, the compass, and the understanding needed to navigate the path ahead and make the best possible decision for their future.
Glossary of Common Terms
- AC (Alternating Current): The type of electricity used by appliances in your home, which an inverter produces.[28]
- Bi-Directional Meter: A utility meter that measures the flow of electricity in two directions—from the grid to your home, and from your solar system back to the grid.
- DC (Direct Current): The type of electricity that solar panels create when exposed to sunlight.[28]
- Grid-Tied System: A solar system that is connected to the traditional utility grid, allowing you to draw power when needed and send excess power back for credit.[29, 6]
- Inverter: The "brain" of a solar system that converts DC electricity from the panels into usable AC electricity for your home.
- ITC (Investment Tax Credit): The common name for the federal Residential Clean Energy Credit, which allows you to deduct a percentage of your solar system's cost from your federal taxes.[28, 6]
- kW (Kilowatt): A measure of power, or the rate at which electricity is used; solar system sizes are measured in kW.[28, 6]
- kWh (Kilowatt-Hour): A measure of energy, or the amount of electricity consumed over a period of time; your utility bill is measured in kWh.[28, 6]
- Net Metering: A utility billing mechanism that credits solar energy system owners for the electricity they add to the grid.
- PPA (Power Purchase Agreement): A financing arrangement where a third party owns the solar system on your roof and you agree to buy the electricity it produces at a set rate.
- PV (Photovoltaic): The technology that converts sunlight directly into electricity.