This report provides an exhaustive analysis of the factors influencing residential solar photovoltaic (PV) installations in the United States, with a primary focus on the distinct requirements and challenges presented by different roof types. It is designed as a comprehensive resource for homeowners evaluating a solar investment and for solar professionals seeking a consolidated technical guide. The content is structured to be accessible to homeowners while providing the technical depth required by installers, designers, and engineers. The report emphasizes the critical interplay between roof condition, material type, structural integrity, and the selection of appropriate installation methodologies to ensure system longevity, safety, and optimal performance.
Foundational Site and Structural Assessment
Before considering the specific challenges posed by different roofing materials, a universal set of prerequisites must be met. This foundational assessment evaluates the roof's age, condition, and structural capacity, along with its geometric suitability for solar power generation. These factors are the primary determinants of a project's feasibility and long-term success.
Roof Age and Condition Assessment
A solar panel system is a long-term asset with an operational lifespan of 25 to 30 years.[1, 2, 3] Consequently, the roof on which it is installed must have a comparable remaining life. Installing a long-term energy system on a roof nearing the end of its service life is financially unsound, as it necessitates the costly removal and reinstallation of the panels when the roof inevitably requires replacement.[4, 5, 6]
Industry best practice dictates that a roof should have a minimum of 10 to 15 years of life remaining before a solar installation is considered.[3, 7] Many professionals recommend replacing any roof older than 15 years as a prerequisite to installing solar panels.[3, 4, 6] For asphalt shingle roofs, the most common residential roofing material, a maximum age of 10 years is often advised to ensure lifecycle synchronization.[8]
This reality creates a crucial "lifecycle synchronization" imperative. The decision to install solar is not merely an energy investment but a long-term roofing decision. The financial viability of the solar project is directly dependent on the remaining useful life of the roof. For homeowners with roofs older than 10 years, a roof replacement should be viewed not as a separate, potential expense but as a probable and integral component of the solar project's total cost. This reframes the financial analysis and underscores the opportunity for integrated "roof and solar" contractors who can manage both projects simultaneously, potentially reducing overall costs through coordinated labor and permitting.[9, 10]
A comprehensive roof assessment by a qualified and independent roofing professional is a mandatory first step.[7, 11, 12, 13] Solar installers, while experts in PV systems, may not possess the specialized knowledge to conduct a thorough roof inspection.[13] This inspection should identify both visible and non-visible signs of unsuitability.
Visual Signs of an Unsuitable Roof:
- General Damage: Evidence of leaks, water damage inside the home or attic, sagging rooflines, and cracked flashing around vents, skylights, or chimneys.[3, 6, 10, 14]
- Asphalt Shingles: Missing, cracked, curling, or bowing shingles are clear indicators of wear. Significant loss of the protective mineral granules, creating "bald spots," also signals that the roof is at the end of its life.[3, 6, 10]
- Biological Growth: The presence of moss, which holds moisture against the roof surface, or dark streaks of algae can indicate underlying moisture problems and material degradation.[3, 14]
Non-Visible Signs (Requiring Attic Inspection):
- Light Penetration: Any daylight visible through the roof deck from the attic points to holes or failures in the roofing system.[6, 15]
- Moisture and Rot: Water stains, dark marks, mold, or mildew on the underside of the roof deck or on rafters are definitive signs of past or current leaks and can indicate compromised structural integrity.[6, 14, 15]
- Ventilation Issues: An improperly ventilated attic can trap heat and moisture, accelerating the deterioration of the roof structure and reducing the efficiency of solar panels.[15]
Structural Load Considerations
A rooftop solar installation adds a permanent load to the building's structure, which must be carefully evaluated to ensure safety and code compliance. These loads are categorized as dead loads (static) and live loads (dynamic).
- Dead Loads: This is the constant, unchanging weight of the solar system itself. It includes the panels, which typically weigh 20 to 50 pounds each, and the mounting hardware or racking.[16] Together, these components add a distributed load of approximately 3 to 4 pounds per square foot (psf) across the array area.[3, 5, 16]
- Live Loads: These are temporary, variable forces that the roof must also support. The primary live loads relevant to solar installations are snow and wind.[16, 17] Heavy snow accumulation can dramatically increase the total weight on the roof, while strong winds can create both downward pressure and significant upward lift forces that pull on the mounting system.[16, 17, 18]
The total load is analyzed in two ways:
- Distributed Load: The overall weight spread across the total area of the array. Local building codes often set a maximum allowable distributed load, such as 5 psf, for such additions.[19, 20]
- Point Load: The concentrated force at each attachment point where the racking system fastens to a roof rafter or truss. Building codes may limit this concentrated load to 45 pounds per attachment point, with a maximum total of 200 pounds per individual framing member.[20, 21]
This distinction reveals a fundamental engineering trade-off at the heart of rooftop solar design. To minimize the risk of leaks, installers logically seek to create as few roof penetrations as possible.[16] However, reducing the number of attachment points means the total system weight is distributed across fewer locations, thereby increasing the point load on each of those rafters.[16] Conversely, increasing the number of penetrations to better distribute the load creates more potential points of water ingress. The optimal design is therefore a carefully engineered balance between structural integrity and long-term water tightness, underscoring the need for a holistic design process that involves both structural engineering and waterproofing expertise.
A structural assessment conducted by a qualified professional is essential to confirm the roof's load-bearing capacity.[17, 22] This evaluation examines the size, spacing, and condition of the roof's framing members, such as rafters or trusses. Minimum standards often require 2x4 lumber with a maximum spacing of 24 inches on center.[20] Older homes with unconventional or widely spaced framing may require structural reinforcement before a solar installation can proceed safely.[6]
Roof Pitch and Orientation
The geometric characteristics of a roof—its direction (orientation) and slope (pitch or tilt)—are primary drivers of a solar system's energy production.
- Optimal Orientation: In the Northern Hemisphere, the ideal orientation for solar panels is facing true south, which is distinct from magnetic south.[23, 24, 25] This alignment maximizes the panels' exposure to the sun as it travels across the southern sky, resulting in the highest possible energy generation.[26, 27, 28]
- Viable Alternatives: While south is optimal, roofs facing east or west are also excellent candidates for solar, typically producing only marginally less energy over a year.[26, 27] An east-west system can be particularly advantageous for homeowners on Time-of-Use (TOU) electricity rates, as it shifts peak production to the morning and late afternoon, often coinciding with periods of higher electricity prices. North-facing roofs are the least productive and are generally avoided unless the roof pitch is very low, minimizing the negative impact of the orientation.[27, 28]
- Optimal Tilt Angle (Pitch): For maximum year-round energy production, the ideal tilt angle for solar panels is approximately equal to the home's latitude.[25, 27] For most of the United States, this falls within a range of 15 to 40 degrees.[26, 29] Conveniently, the majority of residential roof pitches in the U.S. naturally fall within this optimal range, allowing panels to be mounted flush with the roof surface.[27, 28] For seasonal optimization, steeper angles (latitude + 15 degrees) favor winter production when the sun is lower in the sky, while shallower angles (latitude - 15 degrees) are better for summer.[24]
Roof Obstructions and Shading Analysis
The usable area of a roof is often less than its total square footage due to obstructions and shading, both of which must be meticulously analyzed.
- Identifying Obstructions: A thorough site assessment is required to map all roof obstructions, including chimneys, plumbing vents, exhaust pipes, skylights, and HVAC equipment. These features reduce the available surface area for panel placement and can complicate the array layout.[4, 15, 30]
- Shading Analysis: Shade is a critical performance inhibitor. Even partial shading of a single solar panel can significantly reduce the output of the entire series-connected string of panels it belongs to.[31] Common sources of shade include nearby trees, adjacent buildings, and even architectural features of the home itself, like dormers or parapets.[4, 23, 32]
- Analysis Methods:
- On-site Tools: The traditional method involves using a device like the Solar Pathfinder, which uses a reflective dome to capture a 360-degree view of the skyline from the proposed array location. This allows an installer to map the sun's path for the entire year and identify any periods of shading.[33]
- Digital Analysis: Modern solar design relies on sophisticated software platforms that utilize high-resolution aerial imagery, 3D modeling, and LiDAR (Light Detection and Ranging) data.[31, 34, 35] These tools create a precise digital twin of the property and its surroundings, allowing for highly accurate simulations of shadow patterns throughout the day and across all seasons. This analysis yields a Total Solar Resource Fraction (TSRF), which quantifies the percentage of available sunlight that will reach the panels, providing a reliable prediction of energy production and loss due to shade.[31, 34]
- Mitigation Strategies:
- Optimized Layout: The most direct strategy is to design the panel layout to avoid shaded areas of the roof entirely.[33]
- Module-Level Power Electronics (MLPE): In situations where some shading is unavoidable, the use of microinverters or power optimizers is essential. These devices allow each solar panel to operate independently. If one panel is shaded, its reduced output does not drag down the performance of the other panels in the string, thereby minimizing overall production losses.[31, 33]
- Vegetation Management: In cases where shade is caused by trees, selective branch pruning or, if necessary, tree removal can be an effective solution.[31, 36]
Considerations by Roof Type
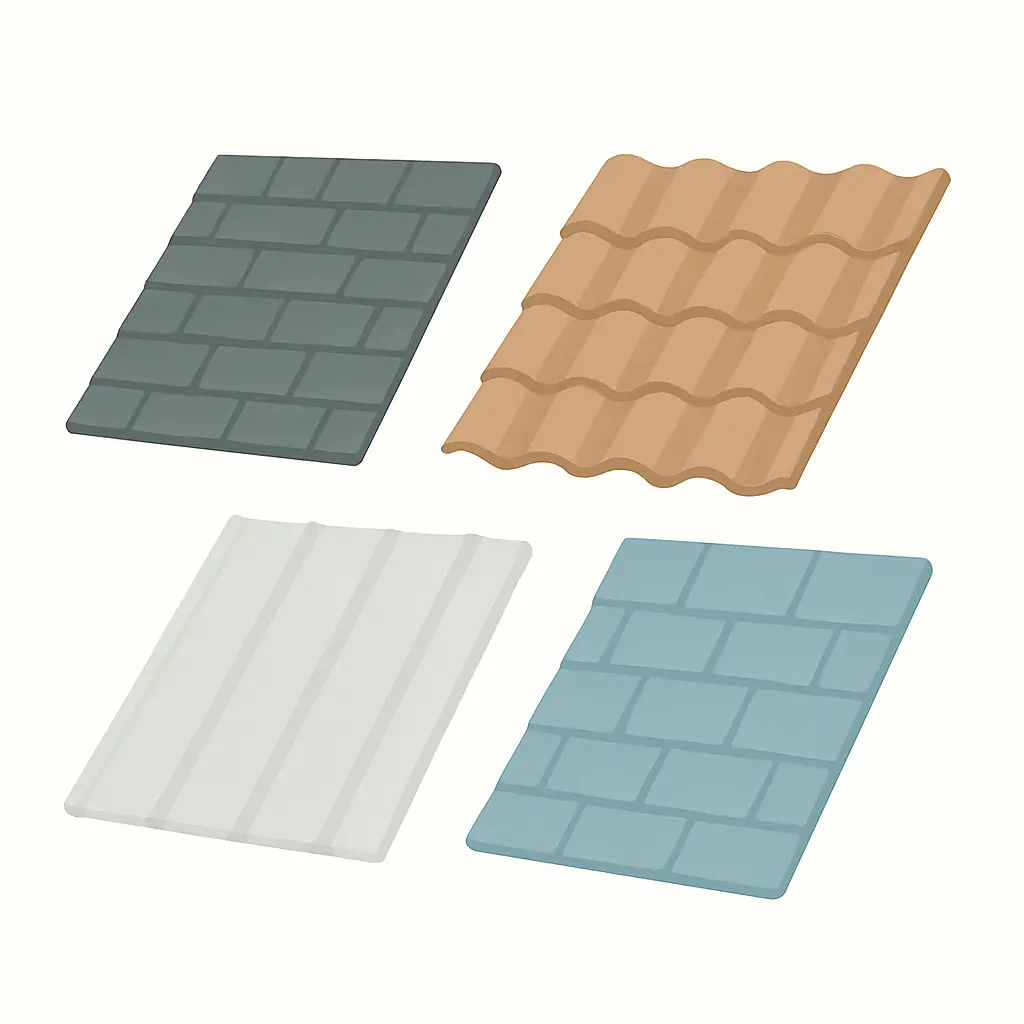
The material and construction of a roof dictate the appropriate installation methods, hardware, labor intensity, and overall cost of a solar project. The following sections detail the specific considerations for the most common residential roof types in the U.S.
| Roof Type | Installation Complexity | Relative Installation Cost | Material Longevity | Primary Mounting Method | Key Advantage |
|---|---|---|---|---|---|
| Asphalt Shingle | Low | Baseline | 15-30 Years | Penetrating Mounts | Most common and cost-effective installation. |
| Standing Seam Metal | Low | Moderate | 50+ Years | Non-Penetrating Seam Clamps | Highest durability; no roof penetrations required. |
| Corrugated Metal | Moderate | Moderate | 40-60 Years | Penetrating Mounts | Durable and long-lasting roof surface. |
| Clay/Concrete/Slate Tile | High | High | 50-100+ Years | Tile Hooks or Replacement Mounts | Extremely long-lasting roof material. |
| Flat Roof | Moderate | Moderate to High | 15-30 Years | Ballasted (Non-Penetrating) | Allows for optimal panel tilt and orientation. |
Asphalt Shingle Suitability
Asphalt shingles are the most prevalent roofing material on U.S. homes, making them the standard for residential solar installations.[11, 37] The process is well-established, and when performed correctly, it is both reliable and the most cost-effective option compared to more complex roof types.[9, 37]
The standard installation method utilizes penetrating mounts. Installers locate the roof's structural rafters and drill pilot holes through the shingle, underlayment, and roof deck directly into the center of the rafter.[11, 23] A mounting bracket, typically an L-foot, is then secured to the rafter using a lag bolt. A system of aluminum rails is then attached to these mounts, and the solar panels are clamped to the rails.[5, 23]
Waterproofing is the most critical element of this process. Each penetration represents a potential point of water ingress, and failure to seal it properly is the primary cause of post-installation roof damage.[23, 38] A multi-layered waterproofing system is required at every attachment point:
- Sealant: A durable, UV-resistant, silicone-based sealant is first injected into the pilot hole to create a seal around the threads of the lag bolt.[38]
- Flashing: A metal flashing is slid under the upslope shingle course, positioned so that its opening aligns with the pilot hole. This piece of metal acts as a mechanical barrier, directing water to flow over and around the penetration point, similar to how flashing works around a chimney or vent pipe.[5, 38] Using high-quality flashing with a warranty of at least 20 years is essential for long-term protection.[38]
- Compression Seal: The lag bolt used to secure the mount typically includes an EPDM rubber-backed washer that, when tightened, creates a final compression seal against the flashing or mount surface.[39]
When these steps are followed meticulously by a professional installer, the solar array will not damage the roof.[23]
Metal Roof Compatibility
Metal roofs are an excellent platform for solar panels, primarily due to their exceptional longevity. With a typical lifespan of 40 to 70 years, a metal roof will almost always outlast the 25 to 30-year life of the solar system installed on it.[1, 2, 40] This eliminates the significant future cost and hassle of removing and reinstalling the panels to accommodate a roof replacement, a major consideration for asphalt shingle roofs.[1, 2]
The compatibility and installation method depend on the specific type of metal roof.
- Standing Seam Metal Roofs: This is the most solar-friendly roof type available. The raised vertical seams that connect the panels provide a perfect anchoring point for a non-penetrating mounting system. Specialized clamps are designed to grip these seams securely, allowing the entire solar array to be mounted without drilling a single hole into the roof's surface.[1, 2, 41, 42] This method is fast, preserves the roof's watertight integrity, and avoids any potential conflicts with the roof manufacturer's warranty.[2, 42]
- Corrugated and Exposed Fastener Metal Roofs: These roofs, characterized by a wavy (corrugated) or trapezoidal profile with visible screw heads, do not have raised seams suitable for clamping. Therefore, they require penetrating mounts.[41, 42] Specialized brackets are fastened through the high points (crests or ribs) of the metal panels into the roof structure below. Meticulous waterproofing is essential. These mounting brackets typically incorporate a butyl rubber gasket on their underside, which forms a compression seal against the metal panel, and use fasteners equipped with EPDM sealing washers to prevent leaks.[42] It is critical for the homeowner to verify with their roof manufacturer whether such penetrations will void their warranty.[42]
- Metal Shingles: These systems mimic the look of traditional shingles but offer the durability of metal. Solar installation is similar to that on asphalt shingles, requiring penetrating mounts and careful waterproofing at each attachment point.[41]
Beyond longevity, metal roofs are lightweight, highly durable, and their reflective surface can help keep solar panels slightly cooler, which can marginally improve their energy production efficiency.[2, 40, 42]
Tile Roof Challenges
Installing solar panels on roofs made of clay, concrete, or slate tiles presents significant challenges, making it the most delicate, labor-intensive, and expensive type of rooftop installation.[37, 43] The primary challenge is the fragility of the tiles themselves; they are designed to withstand weather but are not meant to bear concentrated loads and can easily crack or break when walked on or drilled into.[37, 44, 45]
Due to this fragility, specialized installation methods are required to avoid damaging the roof:
- Inset or "Comp-Out" Installation: This is a widely used and highly reliable method. It involves a roofer carefully removing a section of tiles where the solar array will be located. A new section of roof using standard composite asphalt shingles and underlayment is then built in this area. The solar mounting hardware is then installed onto this new, durable shingle section using standard penetrating techniques. Finally, the original tiles are cut and fitted around the perimeter of the solar array to create a clean, integrated look.[44, 45, 46] This method completely avoids placing any stress on the fragile tiles but requires combined roofing and solar expertise.
- Tile Hooks: This method involves removing individual tiles at specific attachment points. A specialized, durable metal hook is fastened directly to the roof deck and rafter. The original tile is then replaced, often after being carefully notched or ground on its underside to fit flush over the hook's base. The solar racking rail is then attached to the protruding end of the hook.[45] This technique is labor-intensive and requires great care to avoid breaking tiles during removal, cutting, and re-installation.
- Tile Replacement Mounts: An innovative alternative is the tile replacement mount. This is a single piece of hardware that combines a strong mounting post with a flashing plate shaped like the tile it is replacing. The installer simply removes one tile and installs the replacement mount in its place, securing it to the rafter below.[45, 47, 48] This method avoids the need for any tile cutting or grinding, significantly speeding up the process and reducing the risk of breakage.
Regardless of the method, the primary waterproof barrier on a tile roof is the underlayment beneath the tiles.[46, 47] Any penetration must be meticulously flashed and sealed at this layer to prevent leaks. The combination of increased labor, specialized hardware, and inherent risk makes solar installations on tile roofs considerably more costly than on other roof types.[37, 43]
Flat Roof Requirements
While common in commercial buildings, flat roofs are also found on many modern residential homes, particularly in urban and southwestern regions.[37, 49] Installing solar on a flat roof presents a unique set of requirements and advantages.
The most critical requirement is that solar panels cannot be laid flat against the roof surface. A flat orientation results in poor energy production, allows dirt and debris to accumulate (further reducing output), and can lead to pooling water on the panel surface, which can damage the panel and void its warranty.[29] Therefore, all flat roof installations must use a tilted mounting system that angles the panels at an optimal pitch, typically between 15 and 40 degrees, to face the sun.[29, 50]
There are two primary mounting methods for flat roofs:
- Ballasted Systems: This is the most common and preferred method as it is non-penetrating.[51] The racking system, which holds the panels at the desired angle, simply rests on the roof surface. It is held in place by the weight of heavy materials, typically concrete blocks, placed in specially designed trays within the racking structure.[50, 51] This approach completely avoids making holes in the roof's waterproof membrane, which is a significant advantage.[51] The main drawback is the substantial added weight (dead load). A structural engineer must perform a thorough analysis to certify that the roof can safely support the combined weight of the panels, racking, and ballast blocks.[49, 51]
- Mechanically Attached Systems: If a structural analysis determines that the roof cannot support the additional weight of a ballasted system, a mechanically attached (penetrating) system is used.[50, 51] In this method, mounting posts are bolted directly to the roof's structural joists or beams. This requires penetrating the roof membrane, and professional, multi-layered waterproofing at each attachment point is absolutely critical to prevent leaks.[51]
Flat roofs offer a key advantage over sloped roofs: flexibility. Installers are not constrained by a pre-existing roof angle or direction and can position the panels at the mathematically perfect tilt and orientation to maximize year-round energy production.[29, 49] Additionally, access for installation and future maintenance is generally safer and easier.[49, 51]
Installation and System Design Best Practices
Beyond the specifics of each roof type, several overarching best practices in system design and installation are crucial for ensuring the safety, longevity, and performance of any residential solar project.
Mounting Method Selection
The choice between a penetrating and non-penetrating mounting system is one of the most fundamental decisions in a solar installation, dictated almost entirely by the roof type.
- Penetrating Systems:
- Description: These systems secure the solar array to the home's structure using fasteners, such as lag bolts, that pass through the roofing material and anchor into the rafters or trusses below.
- Applicable Roofs: This is the standard method for asphalt shingle, corrugated/exposed-fastener metal, and tile roofs (using hooks or replacement mounts). It is also used on flat roofs that cannot support a ballasted system.
- Advantages: Provides a strong, direct mechanical connection to the building's frame and adds minimal weight beyond the panels and racking themselves.
- Disadvantages: Every penetration is a potential point of failure for the roof's waterproofing. The long-term integrity of the system is entirely dependent on the quality of the waterproofing materials and the installer's workmanship.[1, 23, 52]
- Non-Penetrating Systems:
- Description: These systems secure the array without drilling holes into the roof deck. This category includes seam clamps for standing seam metal roofs and ballasted systems for flat roofs.
- Applicable Roofs: Exclusively for standing seam metal and flat roofs.
- Advantages: The primary benefit is the elimination of leak risk associated with roof penetrations. This also preserves the roof manufacturer's warranty and can often lead to faster, less labor-intensive installations.[1, 2, 42, 51]
- Disadvantages: Ballasted systems add significant dead load to the roof structure, requiring a structural engineering review.[51] Seam clamps are only compatible with a specific and less common type of residential roof.
| Roof Material | Recommended Mounting System | Mounting Method | Key Waterproofing Consideration |
|---|---|---|---|
| Asphalt Shingle | L-Foot with Flashing | Penetrating | Multi-layer seal at each penetration with flashing integrated into shingle courses. |
| Standing Seam Metal | Seam Clamps | Non-Penetrating | No penetrations; waterproofing is not a concern for the mounting system itself. |
| Corrugated Metal | Specialized Brackets | Penetrating | Use mounts with integrated EPDM/butyl gaskets to create a compression seal on the metal surface. |
| Clay/Concrete Tile | Tile Hooks or Tile Replacement Mounts | Penetrating | Meticulous flashing and sealing of the underlayment at every attachment point; avoiding tile breakage is paramount. |
| Flat Membrane | Ballasted Racking | Non-Penetrating | No penetrations; ensure array does not impede drainage. Structural capacity for ballast weight is the primary concern. |
Waterproofing and Sealing Methods
For any installation that requires roof penetrations, waterproofing is not a single step but a systematic process designed to create a durable, multi-layered seal that will last for the 25+ year lifespan of the solar system. Relying on a simple application of sealant is a common but critical mistake that often leads to premature failure.
A successful waterproofing system relies on the interplay of mechanical and chemical barriers. The flashing acts as the primary mechanical barrier, physically diverting the bulk of flowing water away from the penetration point.[30, 53] The sealants, gaskets, and washers provide the secondary chemical and compression barrier, stopping any remaining moisture that might be driven by wind or capillary action past the flashing.[39, 54] The long-term success of an installation depends more on the installer's rigorous adherence to this systematic process than on the specific brand of solar panel being installed. A high-efficiency panel installed with poor waterproofing is a future liability, whereas a standard panel installed with meticulous, multi-layered waterproofing is a durable asset.
- Key Materials:
- Flashing: High-quality metal (typically aluminum) or durable plastic shields are designed to integrate with the specific roofing material. They are installed in a way that overlaps with the roofing material (e.g., under the upslope shingle) to ensure water is shed downslope.[30, 38]
- Sealants: Professional-grade, UV-stable, and flexible sealants are non-negotiable. Silicone and polyurethane-based formulations are widely used for their longevity and ability to withstand temperature fluctuations and environmental exposure.[38, 52, 54]
- Gaskets and Washers: EPDM (ethylene propylene diene monomer) rubber is the industry standard for sealing washers and grommets used in mounting hardware. It offers excellent resistance to UV radiation, extreme temperatures, and moisture, ensuring a long-lasting compression seal.[39, 55]
Drainage and Water-Runoff Management
The installation of a solar array introduces a large, impermeable surface that can significantly alter how rainwater and snowmelt flow off a roof.[56] Without proper planning, this can lead to issues with drainage and debris accumulation.
The array can channel water into concentrated streams or, if improperly placed, act as a dam that causes water to pool.[57, 58] The lower edge of the panels is particularly prone to trapping leaves, pine needles, and other debris. This accumulated material can hold moisture against the roof surface for extended periods, potentially accelerating the degradation of roofing materials like asphalt shingles.[57, 59] This buildup, known as soiling, also casts a shadow on the bottom row of solar cells, reducing the panel's overall energy output.[60]
To mitigate these issues, the system layout must be designed to respect the roof's existing drainage pathways, ensuring that panels do not obstruct valleys or roof drains.[61, 62, 63] A simple and effective solution for managing debris at the panel edge is the use of specialized solar panel water drainage clips. These small, inexpensive devices snap onto the bottom edge of the panel frame, creating a small channel that allows water and debris to drain away instead of accumulating.[59, 60, 64, 65]
Maintenance Access and Serviceability
A solar array should be designed with future maintenance in mind. This includes routine cleaning to remove soiling, periodic inspections of wiring and hardware, and potential servicing or replacement of components like inverters or optimizers.[66, 67]
The array layout must incorporate safe and practical access routes for service personnel.[62, 68] This means leaving designated, clear pathways to and around the array, ensuring that technicians do not have to walk on the panels themselves, which can cause damage.[66, 69] For larger or more complex systems, the design may need to incorporate permanent height safety equipment, such as anchor points for safety harnesses, static lines, or guardrails.[66, 67, 70] The layout must also provide adequate working space around key electrical components, such as junction boxes and inverters, for easy servicing.[71] These access considerations must be balanced with regulatory requirements for firefighter access, as detailed in the following section.
Regulatory and Environmental Factors
Solar installations are governed by a robust framework of engineering standards and building codes that ensure safety and structural integrity. These requirements are highly dependent on the project's geographic location.
Snow and Wind Load Considerations by Region
The structural design of a solar mounting system must account for the most extreme weather conditions it is likely to face over its lifetime. The American Society of Civil Engineers (ASCE) 7 standard, "Minimum Design Loads and Associated Criteria for Buildings and Other Structures," is the foundational document referenced by U.S. building codes for these calculations.[17, 18, 72] The most current version is ASCE 7-22.[73]
Design loads vary dramatically across the country.[74, 75] Installations in the Southeast and along the Gulf Coast must be engineered to withstand the high wind uplift forces of hurricanes. In contrast, projects in the Northeast, Midwest, and mountainous regions must be designed to support the immense weight of heavy snow accumulation.[17, 18, 74]
- Wind Loads: Engineers use the basic wind speed for a given region, along with factors like building height, roof slope, and terrain (known as the exposure category), to calculate the positive (downward) and negative (uplift) pressures the array will experience.[16, 76]
- Snow Loads: Calculations begin with the site-specific ground snow load ($p_g$), which is then adjusted for factors like roof slope (steeper roofs shed snow more easily), the roof's thermal properties, and wind exposure to determine the final design snow load on the roof.[17, 77, 78] Panels tilted at 30 degrees or more are significantly better at shedding snow naturally.[78]
To facilitate these calculations, the ASCE has developed the online ASCE Hazard Tool. This resource allows engineers and installers to input a project address and receive the precise, site-specific design parameters for wind, snow, seismic, and other hazards as required by the ASCE 7-22 standard.[72, 79, 80, 81]
| U.S. Region | Primary Environmental Load | Key Design Consideration | Recommended Equipment/Component Feature |
|---|---|---|---|
| Southeast (FL, Gulf Coast) | High Wind / Hurricanes | Maximize wind uplift resistance. | Use racking systems with high wind speed ratings; ensure sufficient number and strength of attachment points. |
| Northeast / Midwest | Heavy Snowfall / Ice | Support heavy, prolonged snow accumulation. | Select modules certified for high snow loads (e.g., 5000 Pa); use robust rails with shorter spans between attachments. |
| Mountain West (CO, UT) | Heavy Snowfall / High Elevation | Support extreme snow loads and account for potential snow drift. | Elevate arrays to prevent burial in deep snow; use steep tilt angles to promote snow shedding. |
| West Coast (CA) | Seismic Activity | Ensure system remains secure during earthquakes. | Use mounting systems tested and rated for seismic loads; ensure secure connections for all components. |
Fire Rating and Building-Code Compliance
All solar installations must comply with local and national codes to ensure the safety of the home's occupants and emergency responders. The primary governing documents are the National Electrical Code (NEC) for electrical safety and the International Code Council (ICC) suite of codes, including the International Building Code (IBC), International Residential Code (IRC), and International Fire Code (IFC), for structural and fire safety.[82, 83, 84]
A critical requirement of the building and fire codes is that the installation of a solar array must not diminish the roof's existing fire classification (e.g., Class A, B, or C).[21, 82] This is verified through standardized testing by Underwriters Laboratories (UL):
- UL 1703: This standard is used to test and classify the fire resistance of an individual PV module on its own.[85, 86, 87]
- UL 2703: This is a more comprehensive system-level standard. It tests the specific PV module and the specific mounting system together as an assembly to determine a final system fire class rating.[21, 85, 88, 89] Using a UL 2703-listed system provides assurance to building inspectors that the entire assembly has been evaluated for fire performance, mechanical loading, and proper electrical bonding and grounding.[89, 90]
The International Fire Code also mandates specific layout requirements to ensure firefighters have safe access to the roof in an emergency.[21, 91] For pitched roofs (slopes greater than 2:12), these include:
- Access Pathways: A minimum of two clear pathways, each at least 36 inches wide, must be provided from the eave to the ridge on separate roof planes. One of these pathways must be on the street or driveway side of the home.[91, 92, 93]
- Ridge Setback: To allow for roof ventilation operations, the solar array must be set back from the ridge. If the array covers 33% or less of the roof area, an 18-inch setback is required on both sides of the ridge. If the array covers more than 33% of the roof, this setback increases to 36 inches on both sides.[91, 92, 94]
Financial and Legal Implications
The decision to install solar involves significant financial and legal considerations, from the initial installation cost to the long-term implications for property insurance and warranties.
Installation Cost Variations
The cost of a residential solar system is typically measured in dollars per watt ($/W). In 2025, the national average cost is approximately $2.50 to $3.50 per watt before any tax credits or incentives are applied.[95, 96, 97] For a typical residential system size of 6 to 10 kilowatts (kW), this translates to a gross cost ranging from roughly $15,000 to $35,000.[9, 97, 98]
The specific type of roof is a major driver of this cost:
- Asphalt Shingle: Serves as the cost baseline due to the straightforward and standardized installation process.[9]
- Metal: Standing seam installations may have slightly higher hardware costs for specialized clamps but can have lower labor costs due to the speed and simplicity of a non-penetrating installation.[2]
- Tile: Installations on tile roofs are the most expensive. The cost is driven up significantly by the need for highly skilled labor, the increased time required for careful handling of fragile tiles, the risk of breakage, and the cost of specialized mounting hardware like tile hooks or replacement mounts.[9, 37, 45, 99]
- Flat Roof: Costs can be higher than the asphalt shingle baseline due to the material and labor costs of the required tilted racking system. For ballasted systems, the cost of the concrete blocks and the necessary structural engineering report also contribute to the total price.[29, 49, 96]
A premium alternative to traditional panels is solar shingles, which function as both a roofing material and a solar generator. The cost per watt is substantially higher, in the range of $5.50 to $7.00/watt, but this option can be financially viable if a full roof replacement is already necessary.[100, 101, 102]
Warranty and Insurance Implications
A solar installation creates a new relationship between the roof, the solar system, and the legal and financial instruments that protect them.
-
Roof Warranty: A common concern is that installing solar panels will void the roof's warranty. This is a misconception; a professionally executed installation that follows the roofing manufacturer's guidelines will not automatically void the warranty.[12, 103, 104] A roof is typically protected by two distinct warranties: a materials warranty from the manufacturer (covering defects in the shingles or other materials for 25-50 years) and a workmanship warranty from the original roofing contractor (covering installation errors for up to 10 years).[103, 104]
The solar installation process, by definition, modifies the roof and thus voids the original roofer's workmanship warranty for the affected area. To address this, a reputable solar installer must provide their own comprehensive workmanship warranty. This new warranty should last for at least 10 years and explicitly cover any roof leaks or damage resulting from their installation work.[104, 105, 106] The manufacturer's material warranty on the roofing itself remains valid, provided the solar installer adheres to the manufacturer's published installation guidelines.[104]
This transfer of liability makes the solar installer's workmanship warranty the primary legal and financial protection a homeowner has against installation-related roof failures. Consequently, the financial stability, reputation, and longevity of the solar installation company are as critical as their technical proficiency. A 25-year warranty from a company that ceases operations in five years is effectively worthless. Homeowner due diligence must therefore extend beyond technical quotes to include a thorough vetting of the installer's business history, insurance coverage, and industry standing.
-
Homeowners Insurance: Rooftop solar panels are considered a permanent attachment to the home and are therefore typically covered under the dwelling coverage portion of a standard homeowners insurance policy.[107, 108, 109] It is imperative that homeowners notify their insurance provider immediately after the installation is complete. The value of the solar system (e.g., $15,000-$25,000) must be added to the home's replacement cost, which requires an increase in the dwelling coverage limit. This will likely result in a modest increase in the annual premium.[107, 110, 111] Homeowners should carefully review their policy with their insurance agent, as some policies may contain specific exclusions for damage caused by wind or hail.[57, 107]
Conclusion
A successful residential solar installation is a holistic endeavor where the roof is not merely a platform but an integral and foundational component of the energy system. The viability, cost, and long-term performance of a solar project are inextricably linked to the roof's material, age, condition, and structural capacity.
The analysis reveals that while most common roof types are suitable for solar, each presents a unique set of challenges and requires specialized installation techniques, particularly concerning waterproofing and structural attachment. Asphalt shingle roofs offer a cost-effective and straightforward baseline, whereas standing seam metal roofs provide a superior, penetration-free solution ideal for long-term performance. Tile roofs, due to their fragility, represent the most complex and costly installations, demanding highly specialized labor and materials. Flat roofs offer the advantage of optimal panel orientation but require careful structural analysis to support the weight of ballasted systems.
Ultimately, the single most critical factor in a successful rooftop solar project is the selection of a qualified, experienced, and reputable installer. The installer must possess proven expertise not only in PV systems but also in the specific roofing, waterproofing, and structural engineering principles relevant to the home's roof type. Their workmanship warranty serves as the primary safeguard against installation-related issues, making the company's stability and reputation paramount. For homeowners, a thorough pre-installation assessment of the roof's condition is non-negotiable, and for those with aging roofs, a replacement should be considered an integral part of the solar investment. By prioritizing the health of the roof and the quality of the installation, homeowners can ensure their solar energy system is a safe, durable, and productive asset for decades to come.